CloudShow is digital signage software which gives you control over the layout, design, and configuration of all your digital signage displays.
Getting started requires initial setup for both hardware and software. For hardware you'll need a display (a TV or monitor) and a media device (e.g. Amazon Fire Stick or Android TV box) with the CloudShow client software installed. You will also need an account on the CloudShow Device Management website.
To manage your devices and content, you'll need a CloudShow account. Go to
https://cloud.show/Account/Login/ and click "Create Account," or log in with Google or Microsoft accounts (Facebook login option no longer available).
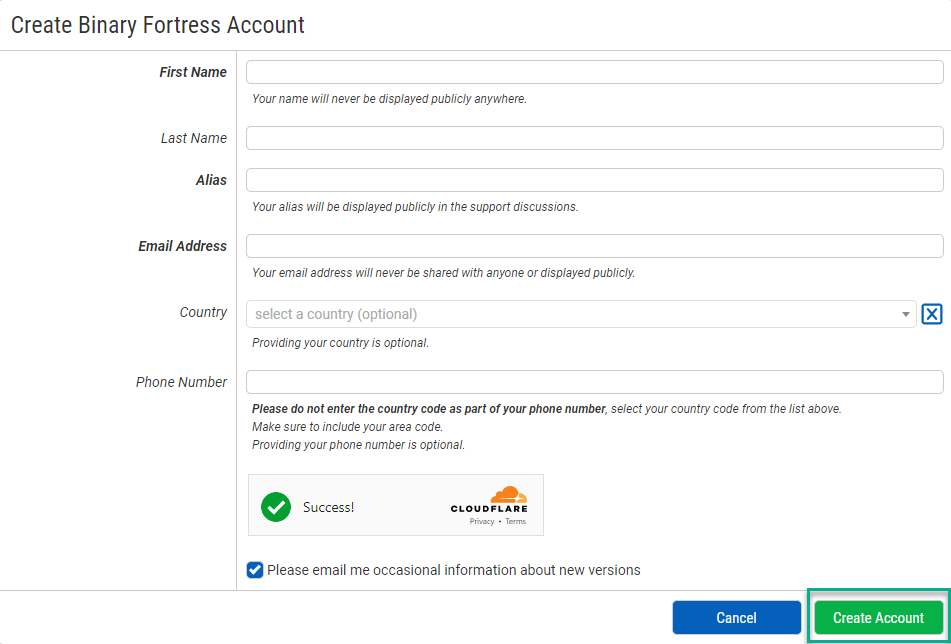
Add your name (will be kept private), a public alias used in support forums, and your email address.
If you already have an account through another Binary Fortress product, use the same email address from that product account login. Country and phone number are optional but encouraged. Click the "Create Account" button.
If you already have your media device installed, see
Installing Client Software to Your Media Device within this document.
The CloudShow client software can run on Windows, Android, Apple, Chrome, Amazon Fire TV devices, and the Nebula Capsule II. (Roku and Apple TV are not supported. Apple OS X and Linux, Raspberry PI are in development.)
Need to order hardware?
We recommend the Amazon Fire TV Stick for your media device. Other recommended hardware are the Blackbird 4K HDMI Splitter and the Mini Wireless Bluetooth Keyboard, but neither are required.
Already have your hardware? Let's get it connected. Follow the connection instructions supplied with your media device.
Power on the device and display and select the designated input for that connected device on your display. Now we need to install the client software.
From your media device (e.g. Amazon Fire TV Stick), download the relevant CloudShow client software. CloudShow client software is available in the Google Play, iOS, and Amazon app stores.
For Windows devices, open a browser and go to the client software download site,
https://cloud.show/devices/. Launch the executable file and complete the installation process as instructed. Launch the program once installed.
It may be easier to perform this part of the process with a second internet-connected device. Haven't downloaded the CloudShow client software? From your media device go to the appropriate app store (e.g. Google Play, iOS, Amazon) or for Windows devices, download the app from https://cloud.show/devices/.
When launching the client software, you'll be shown a pairing screen for linking your media device to the Device Management website,
https://cloud.show/.
The following is for Windows client software users. Not using the Windows client software? See Non-Windows Client Software (e.g. Android) within this document.
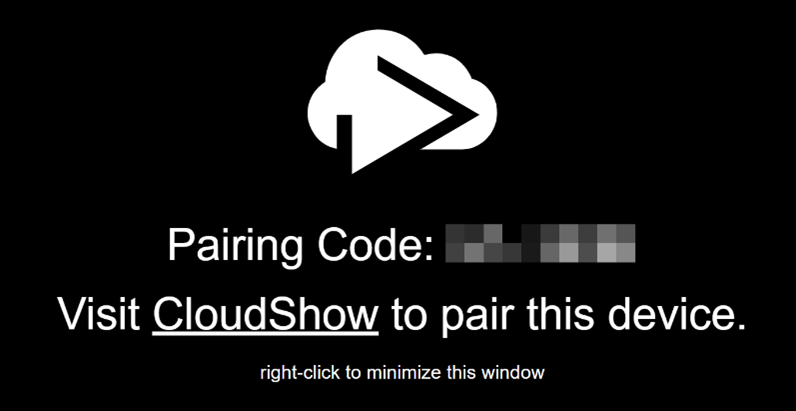
Your pairing screen should look similar to this, with a pairing code you'll enter into the Device Management software on https://cloud.show/. If you've not already created a CloudShow account, do so now. See Create an Account within this document.
If you already have an account, log in at
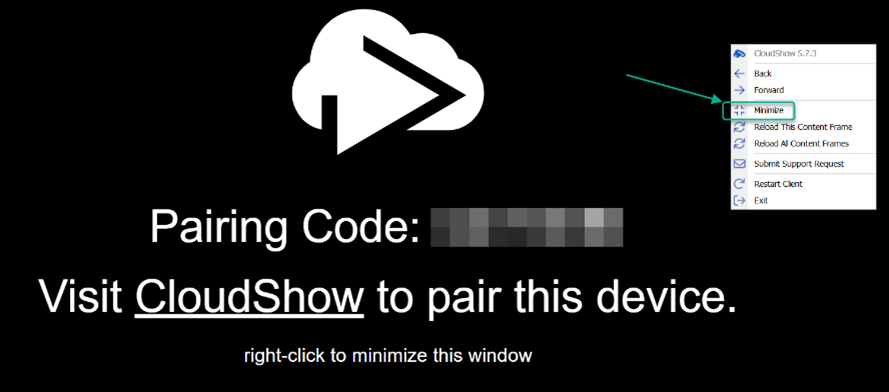
https://cloud.show/account/login/ from the media device or a separate internet-connected device via your browser. If logging in from the same device, your browser may have opened behind the pairing window. Right click the screen and select "Minimize."
Your pairing screen should look similar to this, with a pairing code you'll enter into the Device Management software on
https://cloud.show/.
If you've not already created a CloudShow account, do so now. See Create an Account within this document.If you already have an account, log in at
https://cloud.show/account/login from the media device or a separate internet-connected device via your browser.
To pair a media device with your account, you'll need to be logged in to the CloudShow website. Log in at
https://cloud.show/account/login. You can also find the login screen by going to
https://cloud.show/ and clicking on "Login/Register" as seen here.
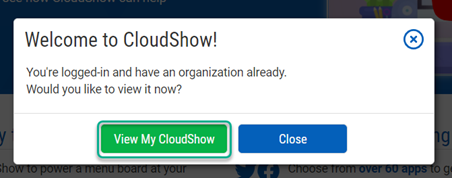
Click on the "View" button as seen in the prompt. (The name on the button will differ based on your chosen organization name.)
If the prompt does not display, select your organization from the "My Organizations" dropdown or the "Manage Organizations" table.
Click on "Pair Device."
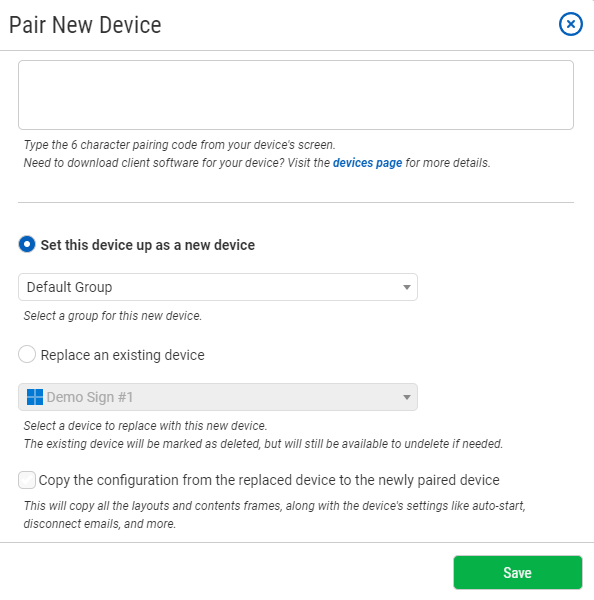
In the prompt, enter your "Pairing Code" as shown to you from the Pairing Screen on your media device. Need a pairing code? See
Pairing Your Device within this document.
You have the option to set up a new device or replace an existing device. If this is your first pairing, select "Set this device up as a new device." Under this option you can add the device to a device group. Your first group is called "Default Group."
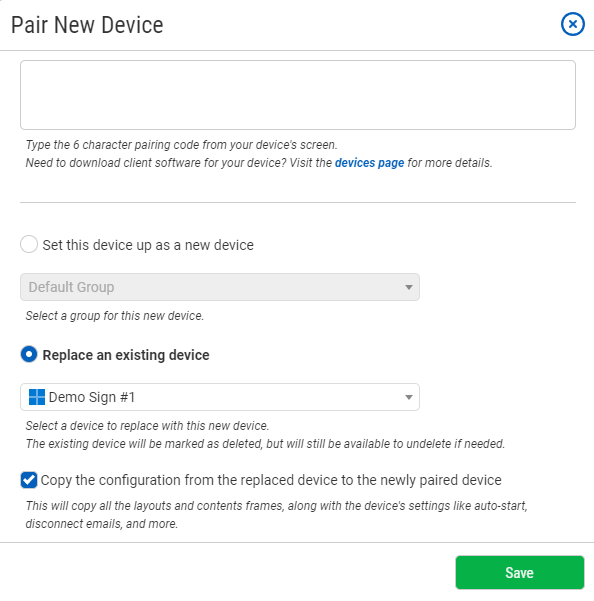
If selecting "Replace an existing device," choose the existing device from the dropdown and if its configuration should be copied to the newly paired device.
Existing devices being replaced will be marked as deleted, but will remain available to undelete if needed. Copied configurations include layouts, apps, and device settings.
Click the "Save" button.
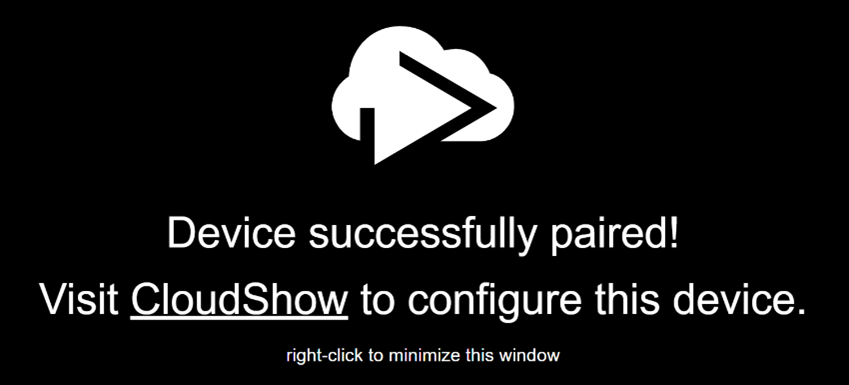
When your device is paired, your media device will show this message (or something similar):
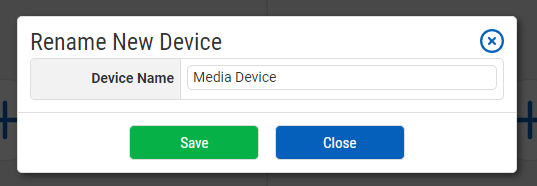
You will also see this prompt on the Device Management website:
Change the device name to whatever will help you easily identify it later. This becomes important with multiple device management.
Click the "Save" button.
Your device is now paired and ready to be configured for content.
Paired devices are listed in your account. Don't have a paired device? See
Pairing Your Device within this document.
Each device has some basic configuration options, such as adding an Admin Password, notifying you when the device is disconnected, and starting the client software automatically when the device turns on.
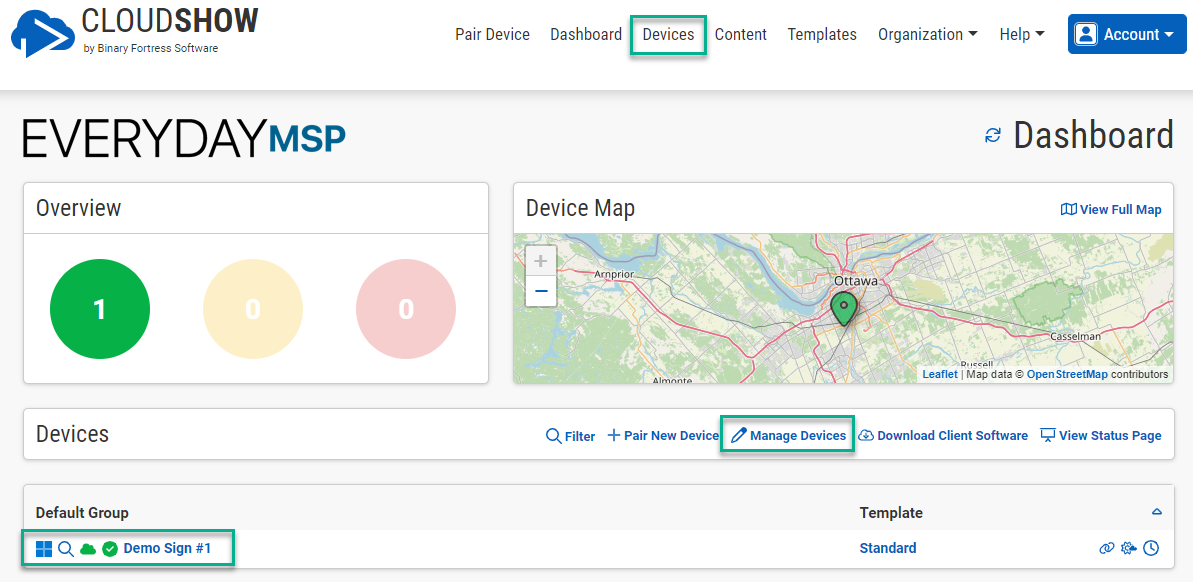
You can manage your devices by visiting the Devices page on
https://cloud.show/, accessible directly via the "Devices" tab. Alternatively, you can click "Manage Devices."
Your devices are also listed in the Dashboard page for your account.
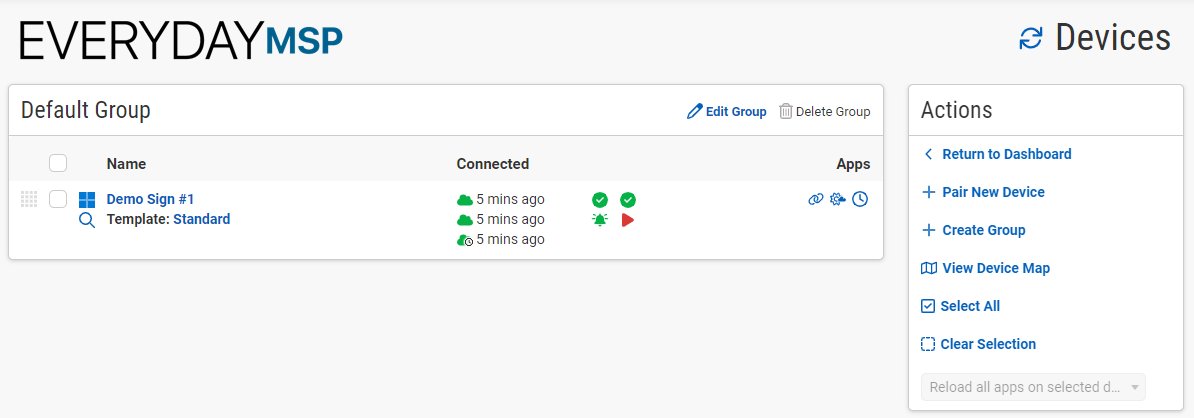
On the Devices page, you'll see all your paired devices with status information. To configure a device, click on the device name. This will take you to the Layout manager where all apps and content are arranged for display on each device.
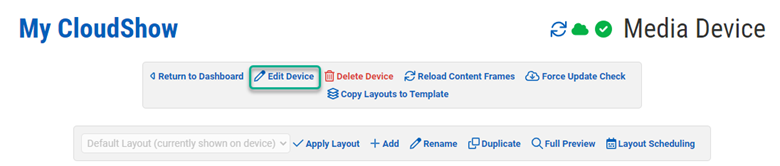
Once on the Layouts page, click "
Edit Device."
A configuration menu will appear with several options. For the top portion of the menu, you can rename the device, move it to a different group, select a layout template (this may be empty), add an Admin Password for securing the device from unwanted changes, and choose from update options.
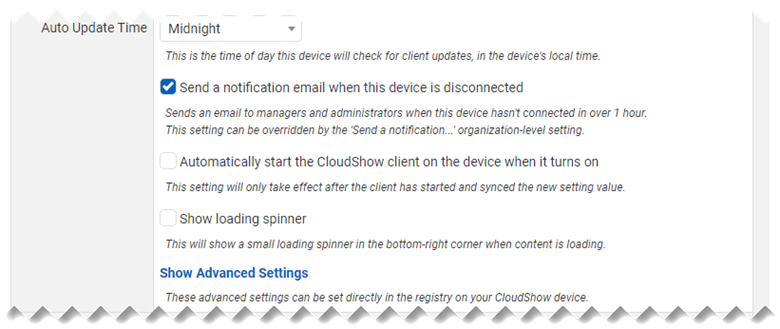
The middle portion of the menu lets you set when updates should be performed, if you'd like to be notified when the device becomes disconnected (more notification options available via Users and Organization settings pages), whether the CloudShow software should launch when the device is turned on, and if a spinner should display to indicate content is loading. For more advanced options, click "Show Advanced Settings."
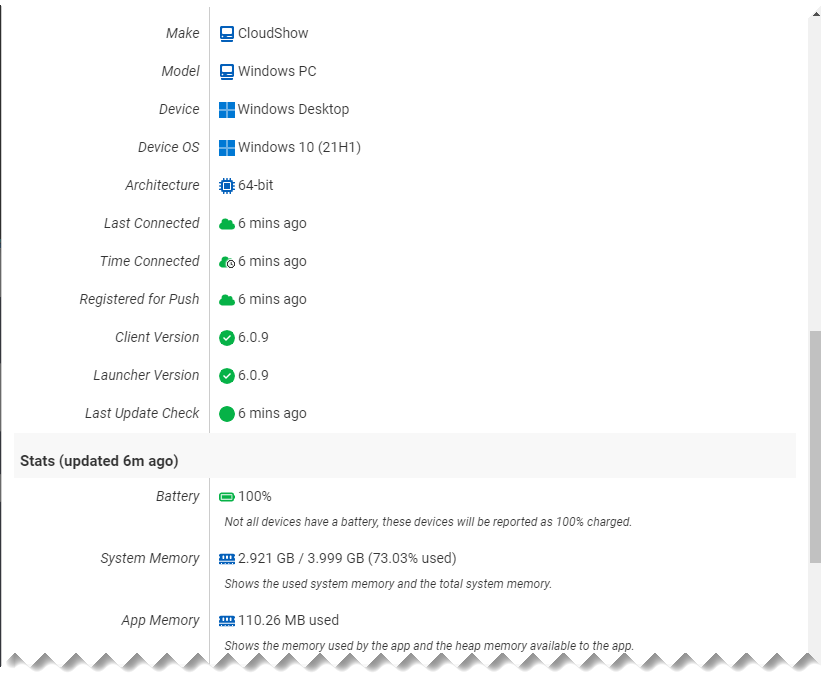
The next portion displays device details and stats.
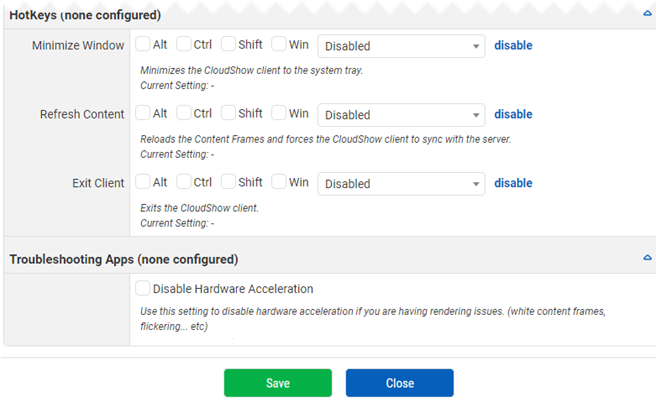
The bottom portion allows the configuration of hotkeys and disabling hardware acceleration.
Click "Save" if any changes were made.
Layouts are grid systems for the content displayed via your media device. Each grid portion of the layout can accept content via an app and is considered part of the Layout once added. The Layouts page has menus that will change based on the current device and template configuration.
The main Layouts menu lets you apply other layouts if available, add a new layout, and rename, delete, or duplicate an existing layout.
You can also preview your layout, showing an enlarged and unobstructed view of your design. Layout Scheduling lets you schedule multiple layouts across various days and times.
To create a layout, locate the device from the various Device listings (Devices tab, Dashboard) and click on the device name.
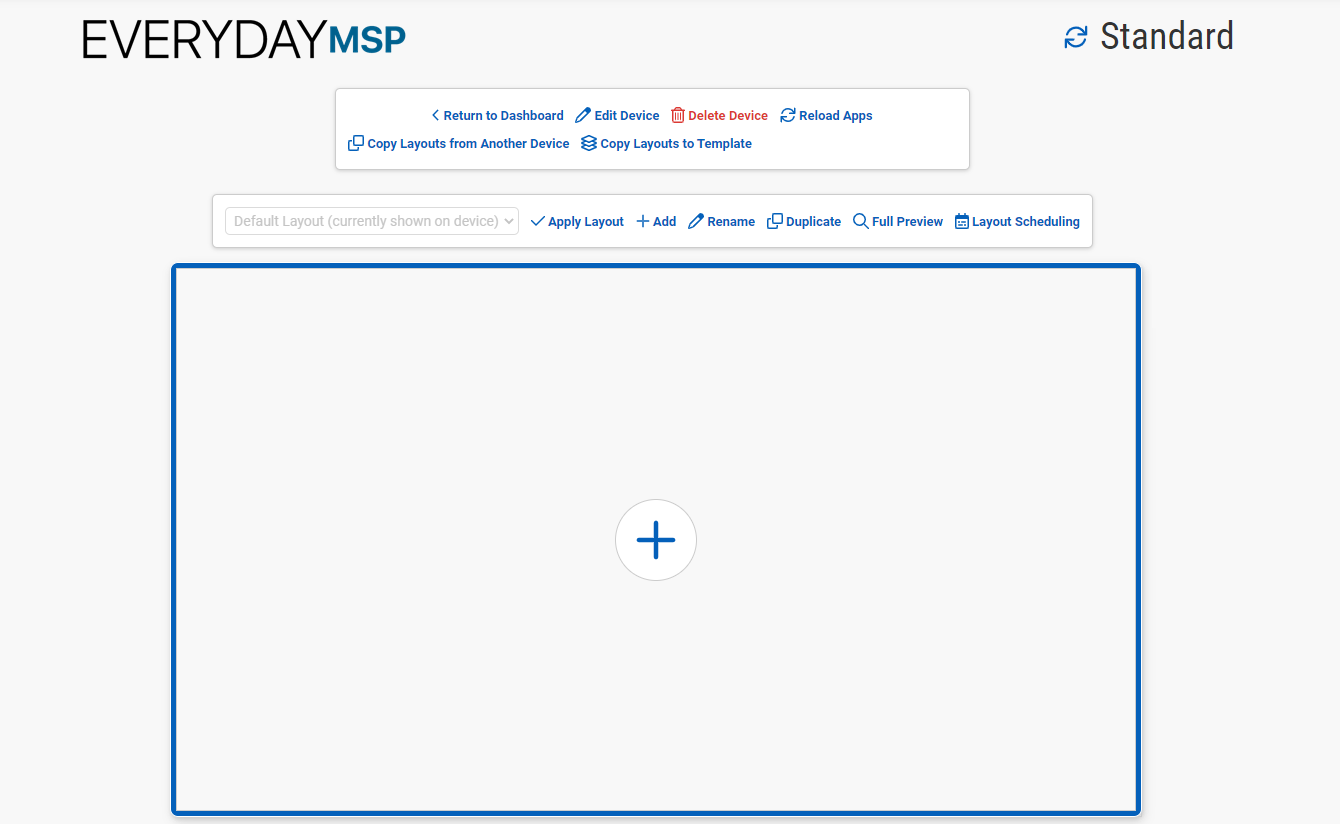
When the device name is clicked, you'll be taken to the Layouts page.
Each physical display is represented by a gray box with a plus icon
at its center.
Unless additional layouts are created, this will be your Default Layout.
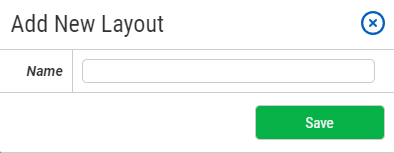
To create an additional layout, click "+ Add."
Name the layout and click "Save."
If you create additional layouts, they can be applied to your media devices in the Layouts page.
See Creating a Layout within this document to navigate here. Select the saved layout from the dropdown menu and click "Apply Layout."
See Creating a Layout within this document to navigate here.
To rename the current layout, click "Rename."
Name the Layout and click "Save."
See Creating a Layout within this document to navigate here.
To create a copy of the current layout, click "Duplicate."
Name the layout and click "Save."
Layout Scheduling allows you to apply and switch between multiple layouts based on the weekly day and time.
To begin, go to the Layouts page for the media device and click "Layout Scheduling." See
Creating a Layout within this document to navigate here.
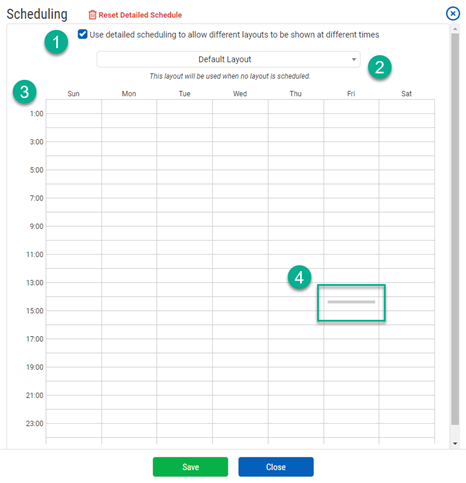
With the checkbox (1) enabled, the scheduler (3) actively uses the layout shown in the dropdown menu (2) where no other layouts are scheduled. The current time is represented by the gray bar (4).
If that bar is not accurately reflecting your local time, you'll need to update the time zone in the Organization Settings page. See
Organization Settings within this document.
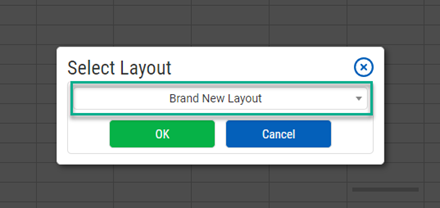
To display other layouts, click anywhere on the scheduler table (3).
Choose which layout to use for that day and click "OK."
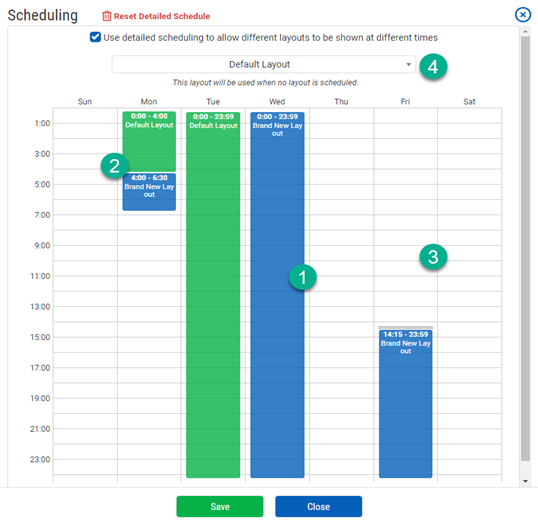
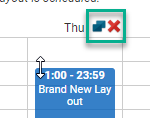
Once a layout has been applied to the day it can be dragged to an alternative day and/or sized to fit specific time constraints. Example (1) in the image is for a full day of a single layout. Example (2) shows layouts designated for particular times in one day. Any blank spaces in the schedule (3) will be populated with the "Default Layout" as designated by the dropdown selection (4).
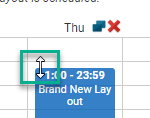
Clicking and holding the mouse on the top or bottom edge of the colored bar, slide the mouse up or down to adjust the start and end times of the layout.Start and end times are limited to 15-minute intervals.
To apply the layout to all other days, click the "Duplicate to All Days" icon
.
When your Schedule is set, click "Save."
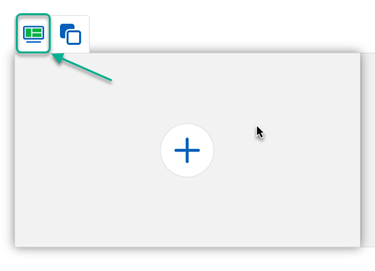
A new layout has areas representing one or more physical displays, depending on your setup. Each physical display is represented by a gray box with a plus icon
at its center.
To navigate here, see Creating a Layout within this document.
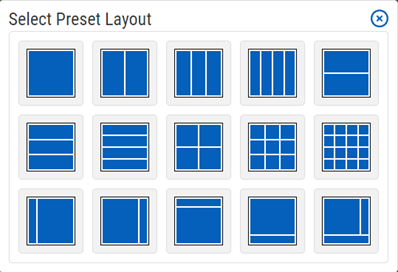
The display is considered one-grid space by default, but can be divided into many different grid configurations. To section the display into smaller grids, hover over the represented display and click the Layout Preset button as shown here.
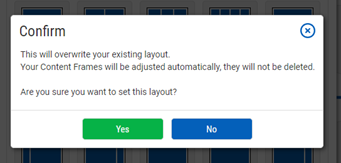
Choose from a variety of preset layout grids. Click the grid pattern to apply it.
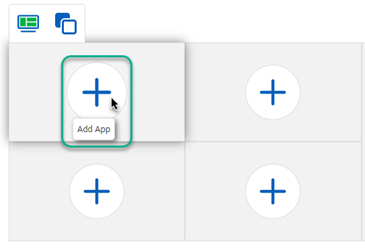
Content is added to your displays via Apps. The Apps are what populates the grid system of your Layout, ultimately creating the visuals for your CloudShow.
The App selection menu, as shown below, is accessed by clicking the plus icon
in the middle of the gray box in your Layout. To navigate here, see
Creating a Layout within this document.
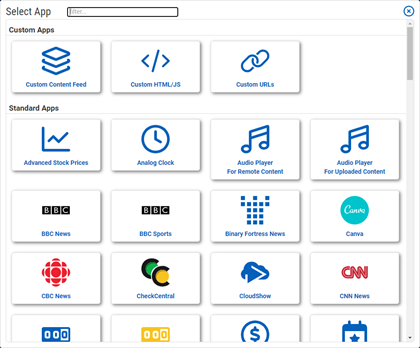
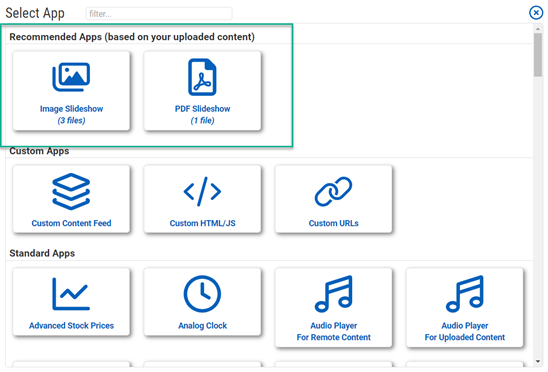
The apps are grouped as Standard Apps, Custom Apps, and Troubleshooting Apps.
Given the quantity and variety of content, this guide will not cover every app, but the configuration menus are similar for most. Apps listed are subject to change.
Custom Apps require more content creation and configuration. Troubleshooting Apps will be covered in separate documentation. Once you have uploaded content (See Content within this document), a Recommended Apps section will also show at the top.
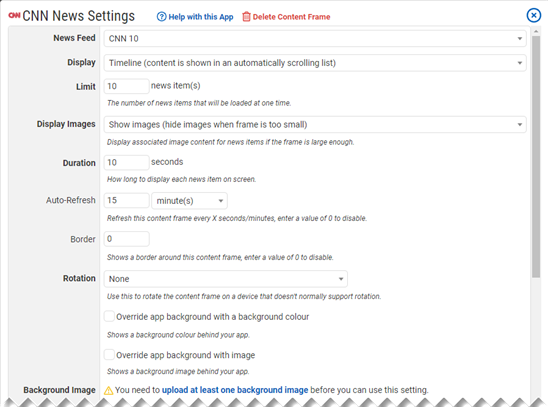
Standard Apps have focused content which allow for easier configuration. For this example, we will choose the CNN app. To navigate here, see
Creating a Layout within this document.
Click on the app button.
From the App Settings menu, choose your configuration options (how you want the app to look and behave). Options will vary from app to app. Some common options are Border Size and Color, Rotation, and Background Color and Image.
Tip: Try the default settings for each app and see if it fits your needs. All configuration settings can be changed later.
More advanced settings, like Scaling and Positioning, are available at the bottom of the Settings menu.
Click "Save."
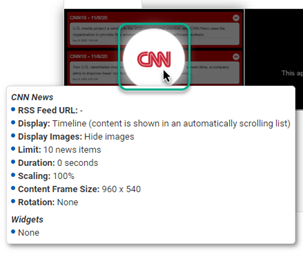
Your App is now applied to your media device Layout and running. To see the settings at a glance, hover over the active App's icon.
To edit an active App's settings, click the active App icon in the grid display.
To navigate here, see Creating a Layout within this document.
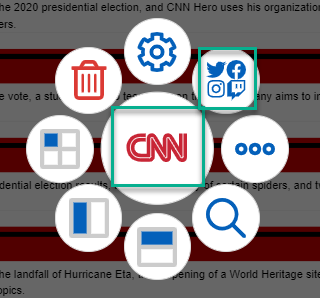
A wheel of options will emerge around the active App icon. The gear icon
will open the Settings menu for the App. Click the icon to open the menu.
To change an app, click the active App icon in the grid display. To navigate here, see
Creating a Layout within this document.
A wheel of options will emerge around the active App's icon. The App selection icon
will open the App selection menu. Click the icon to open the menu.
To delete an app, click the active App's icon in the grid display. To navigate here, see
Creating a Layout within this document.
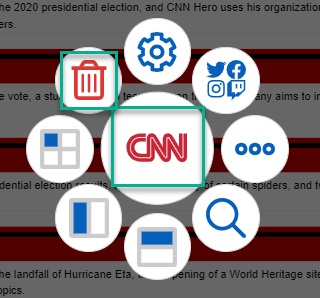
A wheel of options will emerge around the active App's icon. The delete icon
will prompt you to confirm deletion. Click the icon.
When the prompt displays, click "Yes."
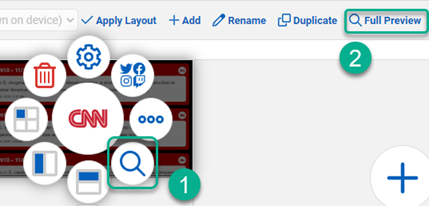
Previews are representations of the content shown on displays connected to your media device(s). To preview the Apps you've added and configured, you can either preview each grid/app space (1), or preview the entire layout (2). Click on the appropriate icon or link.
This area will populate when you've uploaded custom Content to the Content page. Ready to upload Content? See
Adding Content within this document. To navigate here, see
Creating a Layout within this document.
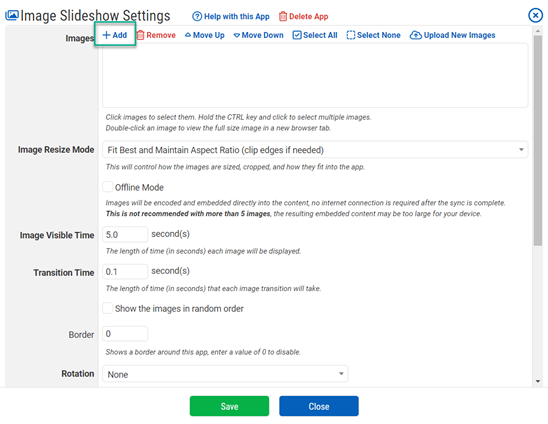
Select the type of app (based on uploaded content) and choose from your uploaded content.
Click "+ Add" to populate the app with custom content. (Link text may vary based on file type.)
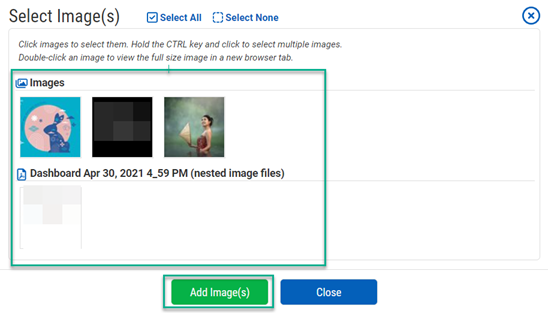
Select the files you wish to display in the app and click "Add Image(s)." (Button text may vary based on file type.)
When returned to the main app menu, set the other configuration options and click "Save."
Templates are a larger union of a Layout and Device configuration. To use the same Layout and configurations across multiple media devices, you will need a Template. To create a Template, you can either create a new Template or copy an existing Layout to a Template.
Click the "Templates" link from the main menu.
If this is your first template, you'll see the message above. Click the link "create a template from scratch."
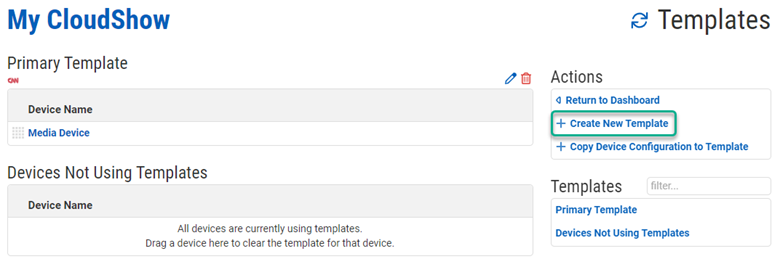
If you have existing templates, you'll see a page similar to this:
Click "+ Create New Template."
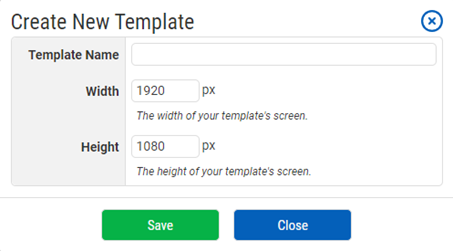
From either link, a basic configuration menu is shown.
Name the template and adjust the Width and Height to match your physical display size. Click "Save."
You're now taken to the Layouts area where you can create your Layout Template.
See Creating a Layout within this document to continue.If you've already created a Layout and want to make it into a reusable template, there are two ways to do so.
From the Layouts screen (
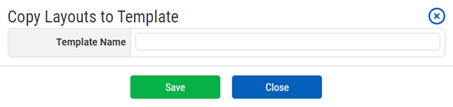
See Layouts within this document to navigate here), click "Copy Layouts to Template."
Name the Template and click "Save."
Click the "Templates" link from the main menu.
If this is your first template, you'll see the message above. Click the link "Copy a device configuration to a new template."
Choose the media device for which you've created a Layout. Name the template and click "Save."
Haven't created a Layout? See Creating a Layout within this document.
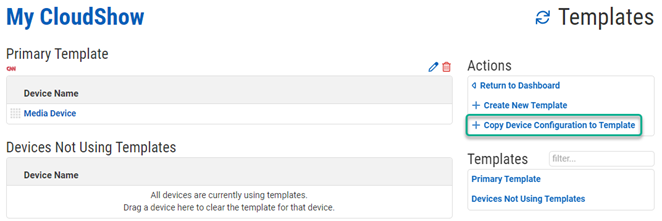
If you have existing templates, you'll see a page similar to this:
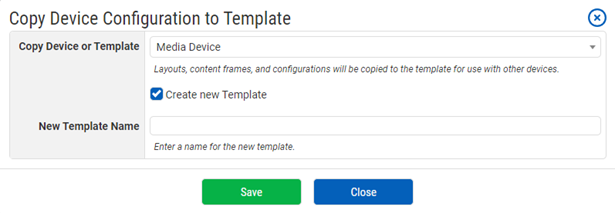
Click "+ Copy Device Configuration to Template."
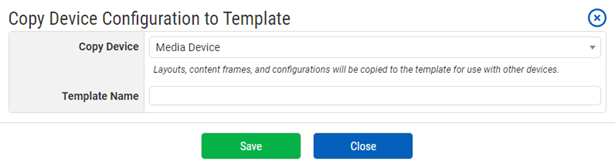
From the menu, choose the media device with the Layout from which you'll create the template. You can also choose an existing Template rather than the media device.
To create a new template, select "Create new Template." Name the new Template and click "Save."
If "Create new Template" is deselected, you will need to choose an existing Template to overwrite. Choose the existing Template and click "Save."
Content is the storage area for files used in custom Apps for your Layouts. Files can be uploaded to the Content area from your computer, Dropbox, Stock Image services (e.g. Pexels), or those created using Canva. (Requires a Canva account.)
File options include audio, image, video, PDF, and more with a maximum file size of 50MB.
Navigate to the Content page from the main menu.
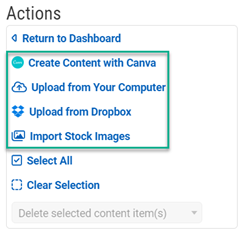
Other than your listed content, you will see Actions: "Create Content with Canva," "Upload from Your Computer," "Upload from Dropbox," and "Import Stock Images."
Once on the Content page, click on any of the various source links in the Actions menu.
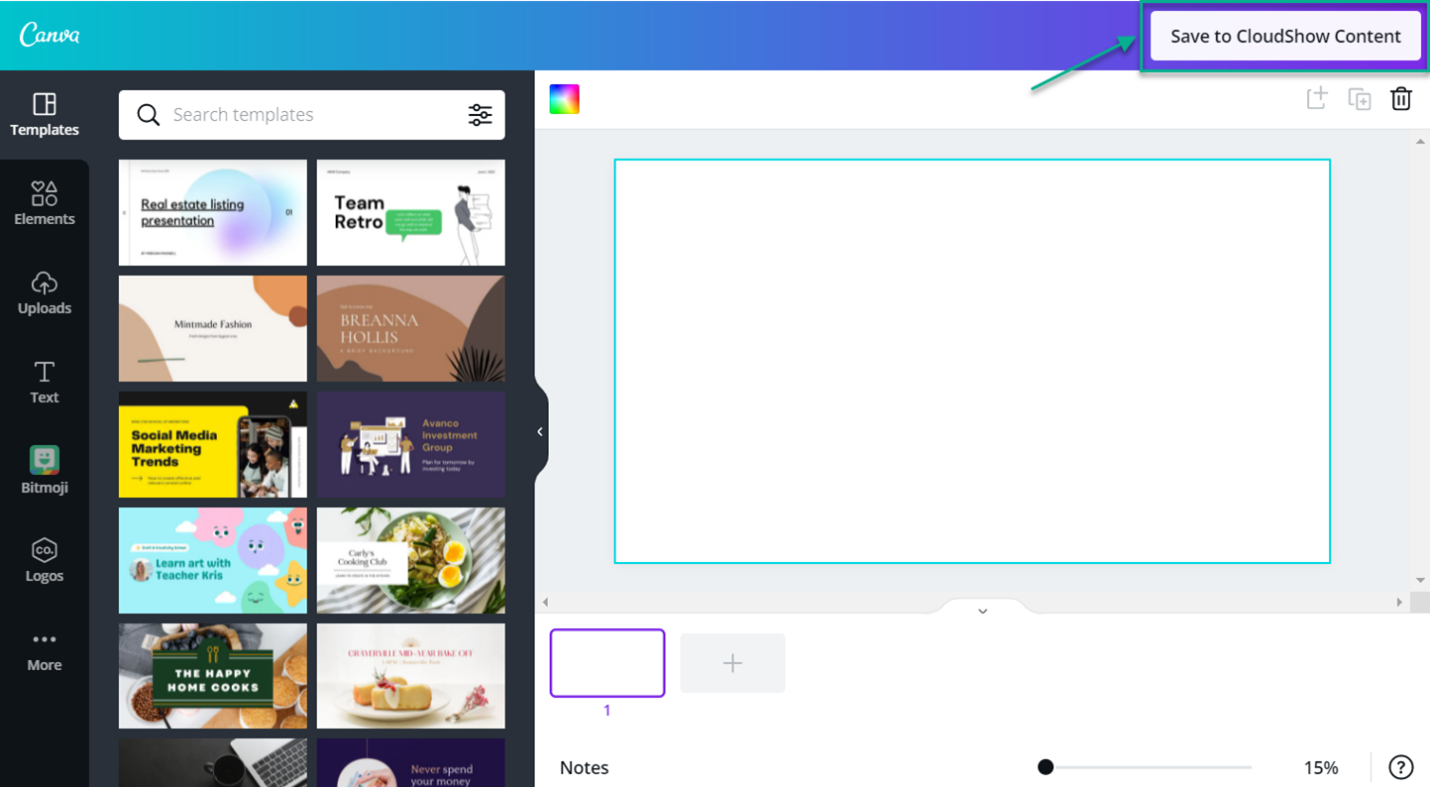
Canva is a web-based design software with thousands of free templates and graphics.
To use Canva, you will need a Canva account. Sign up here
https://www.canva.com/ Once you have an account, you can use Canva content in CloudShow.
Navigate to the Content page via the main menu of CloudShow. Go to the Actions menu on the right. The "Create Content with Canva" link will open a creative window over the page. Use the Canva templates and tools to create custom images and click "Save to CloudShow Content."
Navigate to the Content page via the main menu of CloudShow. Go to the Actions menu on the right and click "Upload from Your Computer." Select the content you wish to upload by clicking "Choose File(s)," click the file(s), click "Open," then click "Upload File(s)."
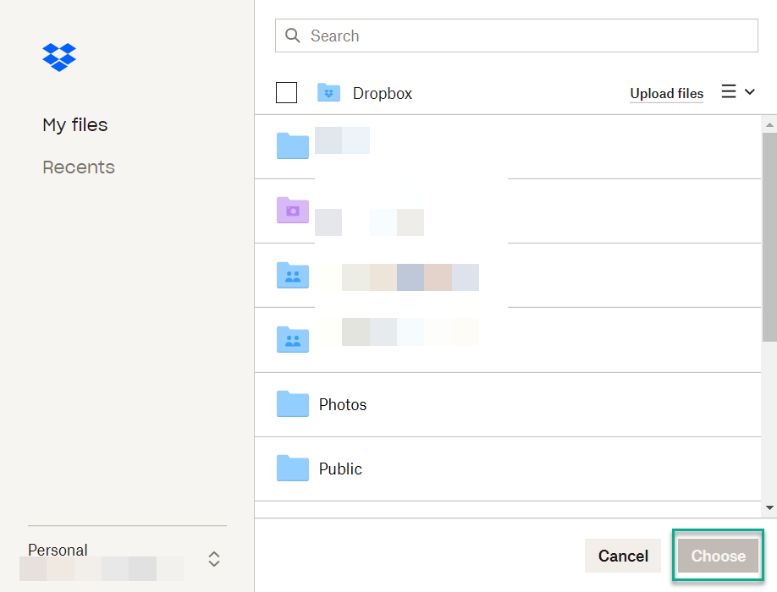
Navigate to the Content page via the main menu of CloudShow. Go to the Actions menu on the right and click "Upload from Dropbox."
Select the file(s) and click "Choose."
Navigate to the Content page via the main menu of CloudShow. Go to the Actions menu on the right and click "Import Stock Images." Choose from the images populated in the page. You can search for specific images using keywords in the search field on the right of the page.
Files may take some time to upload. Once uploaded, they will be grouped by file type and listed in the main Content page.
Once you've uploaded content to the Content page, you can use it in various Apps.
Haven't uploaded content yet? See Adding Content within this document. To configure and use the apps for your content, see Recommended Apps within this document.
The Organization pages are used to manage Users, general Settings, and Subscription details.
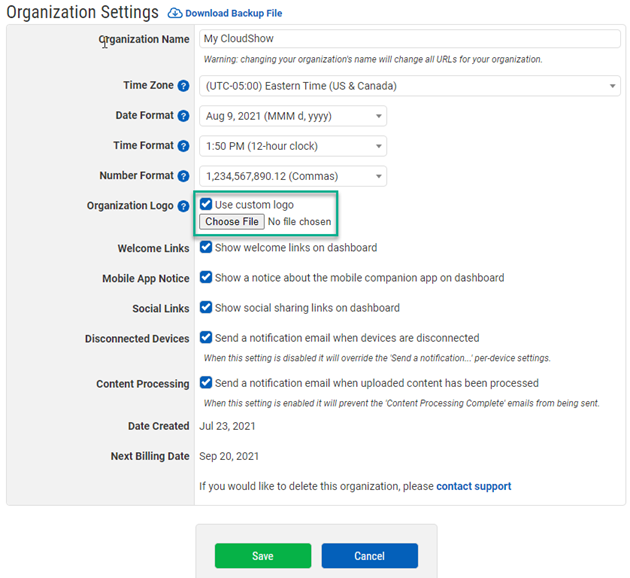
Settings let you make basic configurations for the CloudShow software, such as Time Zone, Date and Time formats, and the use of a custom logo.
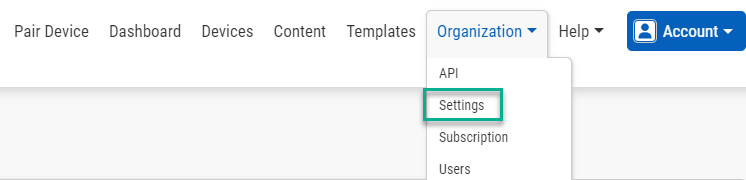
Navigate to the Organization tab on the main menu and click "Settings."
Most settings can be changed via dropdown selectors or by enabling boxes.
To use a custom logo, however, you must enable the checkbox shown above, click "Choose File," select the logo from the prompt, and click "Open."
That logo will display in the upper left of pages on the CloudShow site.
After your settings are configured the way you like, click "Save."
Users are those allowed various access to your CloudShow organization and the software in general.
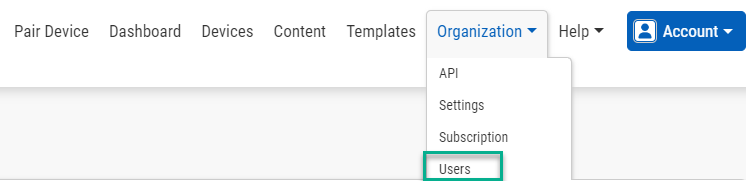
Navigate to Users via the Organization tab in the main menu.
Your users are listed in the Users table.
To add a User, navigate to the Users page via the Organization tab in the main menu.
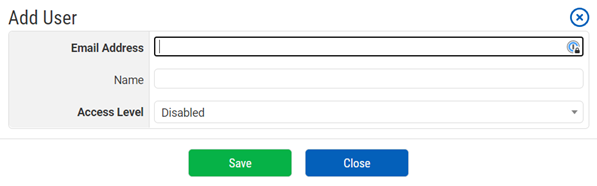
Click "+ Add User."
Enter the User's Email Address, Name, and choose their Access Level. Access Level descriptions are shown on the User's page (also shown below).
Click "Save."
Navigate to the Users page via the Organization tab in the main menu.
Click the Edit icon
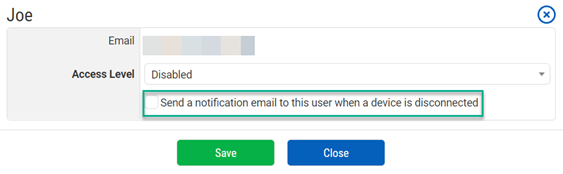
to update a user's Access Level and to enable/disable notification settings.
Click the checkbox next to "Send a notification email to this user when a device is disconnected" to enable that option. If it is already enabled, click to disable it, if desired.
Click "Save."
To delete a user, click the Delete icon
. You cannot delete yourself from an organization.
From the deletion prompt, click "Yes."
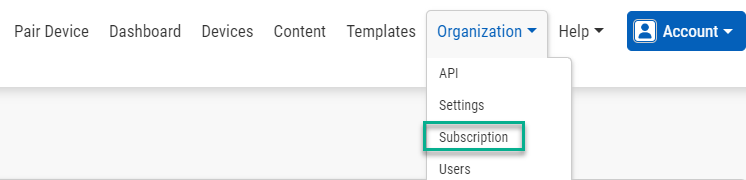
The Subscription area is for making financial-related changes to your account, such as billing information and subscription type, as well as additional device allowance.
Navigate here via the Organization link on the main menu.
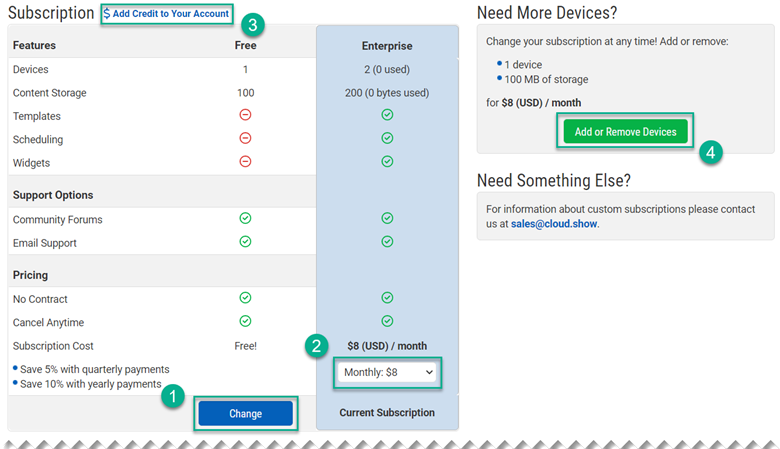
To change your subscription type, click the "Change" button (1), choosing between "Free" and "Enterprise" (paid). Free subscriptions are limited to 1 Device, 100MB of Content storage, and do not have the Templates, Scheduling, or Widgets features.
On the Enterprise subscription, you can pay at different intervals (Monthly, Quarterly, and Yearly). The price is discounted for the Quarterly and Yearly options. Click the dropdown selector (2) to choose payment intervals.
To pay in advance, click "$ Add Credit to Your Account," (3) enter the credit amount, and click "Submit."
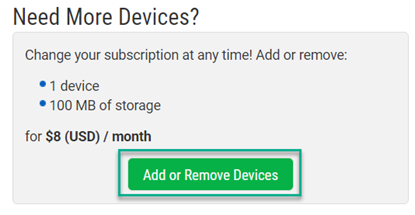
When you need to add more devices to your account, navigate to the Subscription page via the Organization tab in the main menu.
Click "Add or Remove Devices."
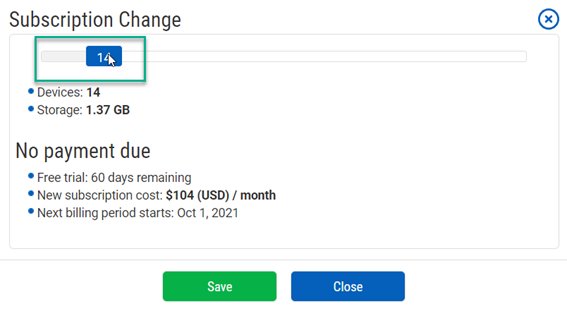
Click and drag the scroll button to increase or decrease the Device count.Increasing the number of devices also increases the Content storage size. The adjusted subscription cost will show in the Subscription Change window.
With the desired number of devices set, click "Save."
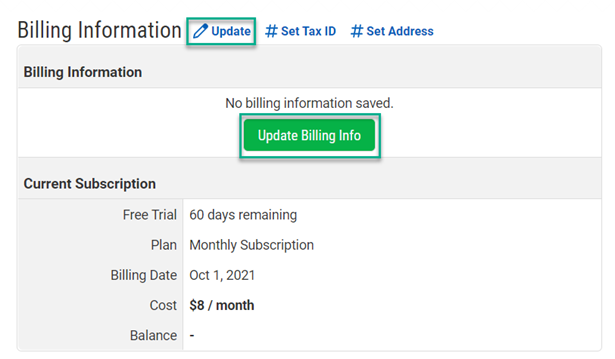
To add or update your billing information, navigate to the Subscription page via the Organization tab in the main menu.
Click "
Update." If you've yet to add any billing info, you can also click "Update Billing Info."
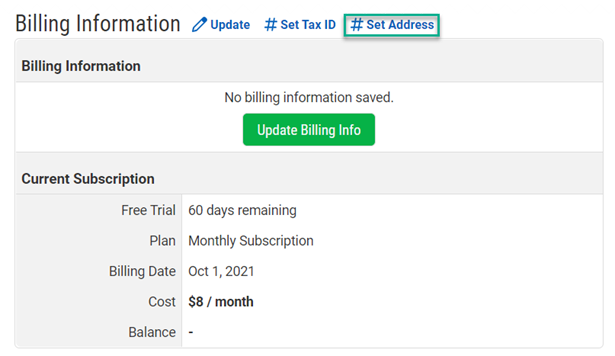
Click "# Set Address" to enter your billing address.
For either billing information link, you will be redirected to the Stripe payment page to enter your billing details. When your information is complete, click "Save card." To return to the CloudShow site, click the Binary Fortress logo
in the upper left of the page.
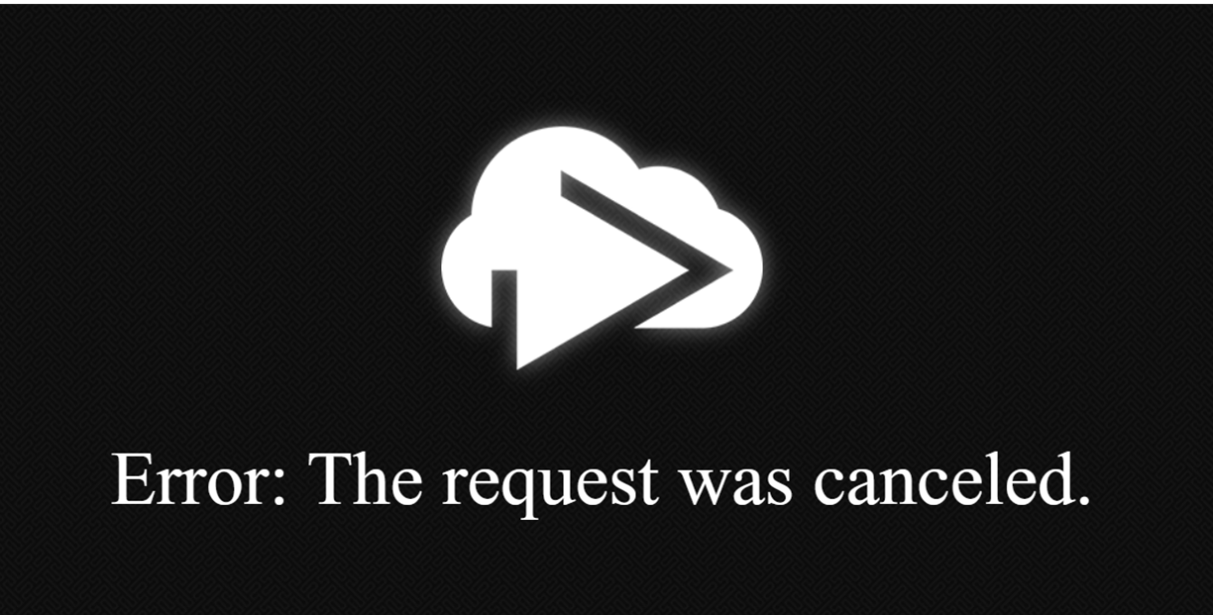
During pairing you were shown this or a similar error screen:
The screen should have returned to the normal pairing screen with your pairing code. If not, please contact us at
support@binaryfortress.com.
For all support options, visit
https://cloud.show/Support/CloudShow Digital Signage management software serves universities, hospitals, manufacturers, medical offices, hotels, retailers, and restaurants, helping create eye-catching displays for guests and customers.
To learn more about CloudShow, visit:
https://cloud.showBinary Fortress has spent 19 years in pursuit of one goal: create software to make life easier. Our software ranges from display management and system enhancement utilities to monitoring tools and digital signage. IT administrators, professional gamers, coffee-shop owners, and MSPs all rely on Binary Fortress to make their days better, and their lives easier.
Copyright © 2007-2026 Binary Fortress Software, all rights reserved.
The Binary Fortress logo is a trademark of Binary Fortress Software.
The CloudShow logo is a trademark of Binary Fortress Software.
Binary Fortress Software
1000 Innovation Drive, Suite 500
Kanata, Ontario, Canada
K2K3E7
https://www.binaryfortress.com